


Detachable Cable Modding a Pair of ATH-EW9s
Light documentation of the modding process for a pair of Audio-Technica headphones.
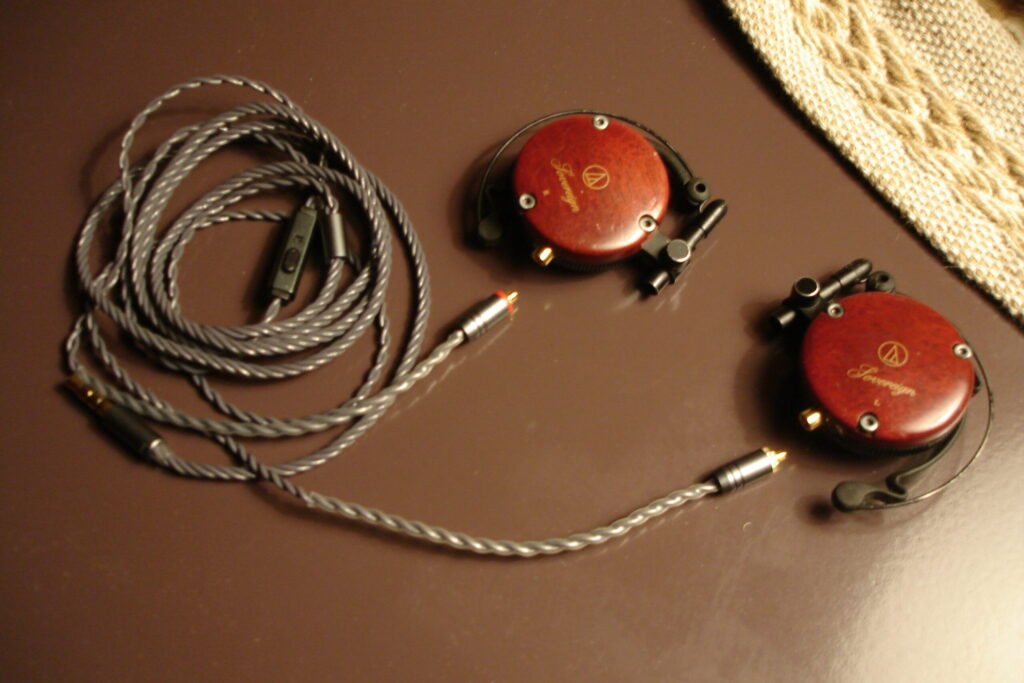
This guide will give you an idea of how to complete a detachable cable mod for a pair of Audio-Technica ATH-EW9 clip-on earphones. After completing this modification, you will be able to use any MMCX cable you desire with the EW9s, freeing you from the headaches that come with damaged internal wiring and the…’unique’ wiring situation that comes stock.
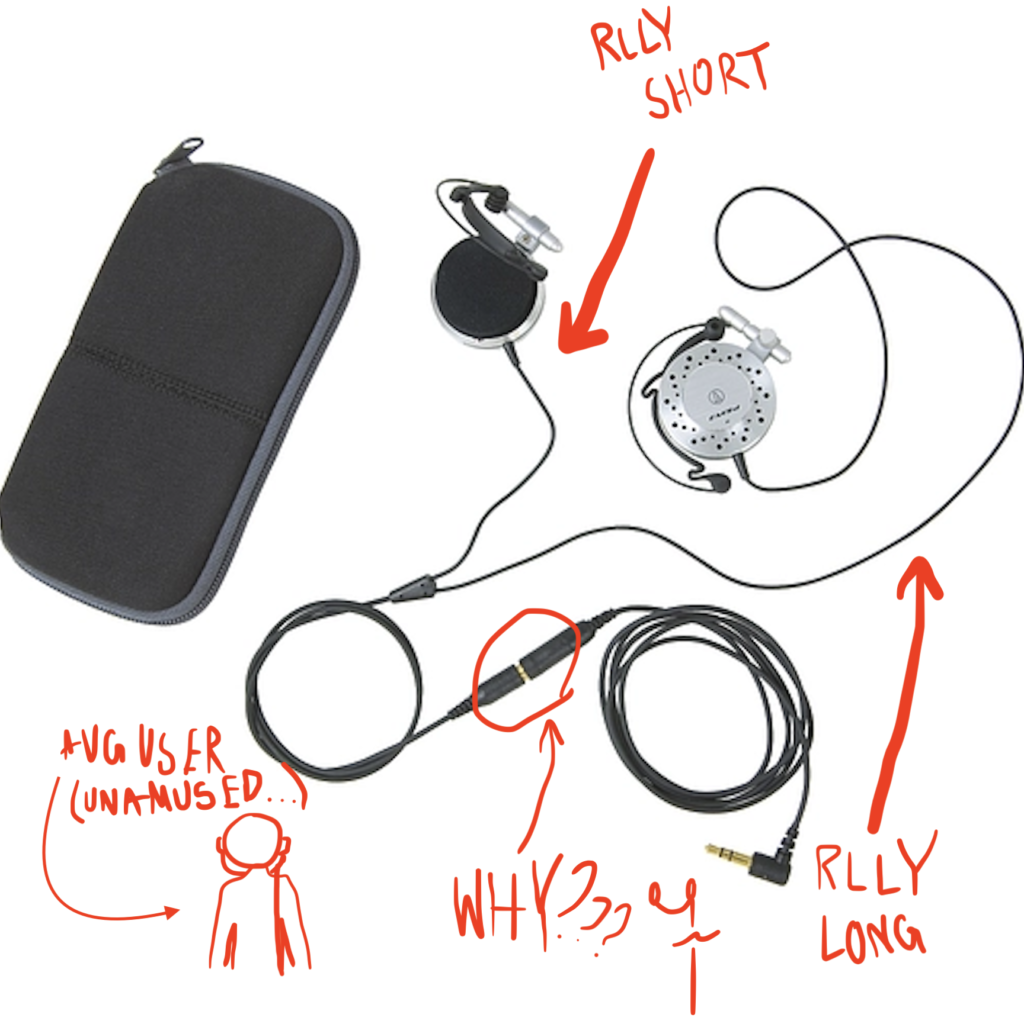
Parts List
- MMCX Socket
- MMCX Cable
- Solid Core Wire 28 AWG
Tools List
- 1.3mm Hex Screwdriver
- Soldering Iron
- Craft knife or Dremel with rounded tip bit
I. Teardownnnnn. Use the 1.3mm Hex Screwdriver to remove the three screws on the headphones’ outer shell. Remove the shell, ear clips, and foam padding that sits directly on the driver. Set loose parts aside.
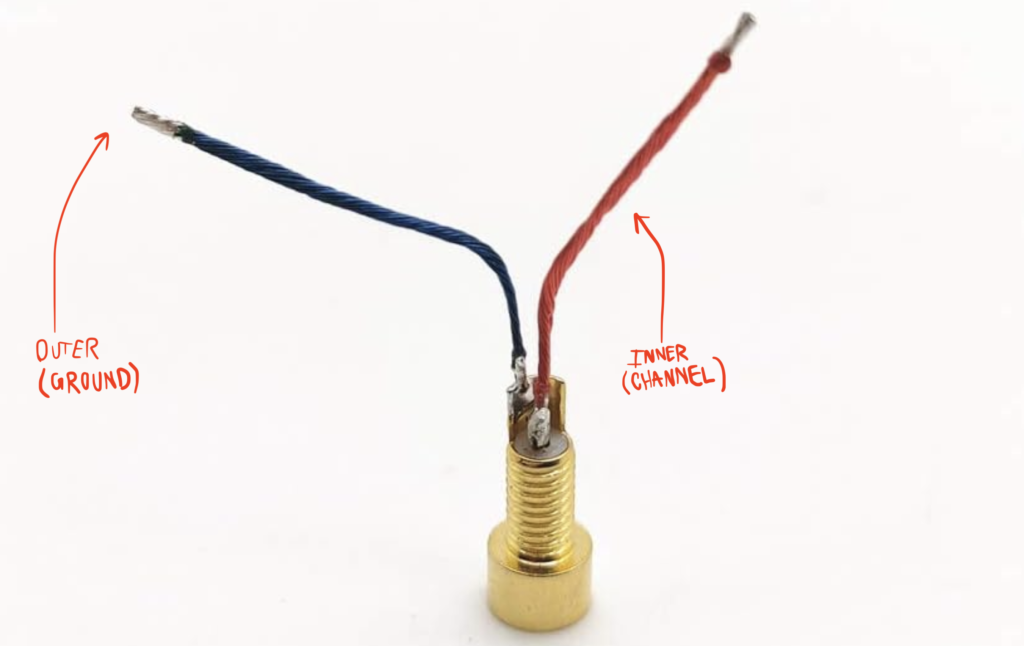
II. Connect it uppppp. Develop a plan to match the MMCX socket pinout to the speaker driver pinout. The outer housing of the MMCX socket is for common ground, and the inner ‘nipple’ is for the channel signal.
On the speaker side of things, the common ground pad has a copper-colored wire, and the channel wire is colored (varies depending on the side).
This is an extreme oversimplification of how to wire something. If you’re new to this kind of stuff, check out this video and see if it helps. TL;DR: plan to match the proper channels, and you’re good to go.
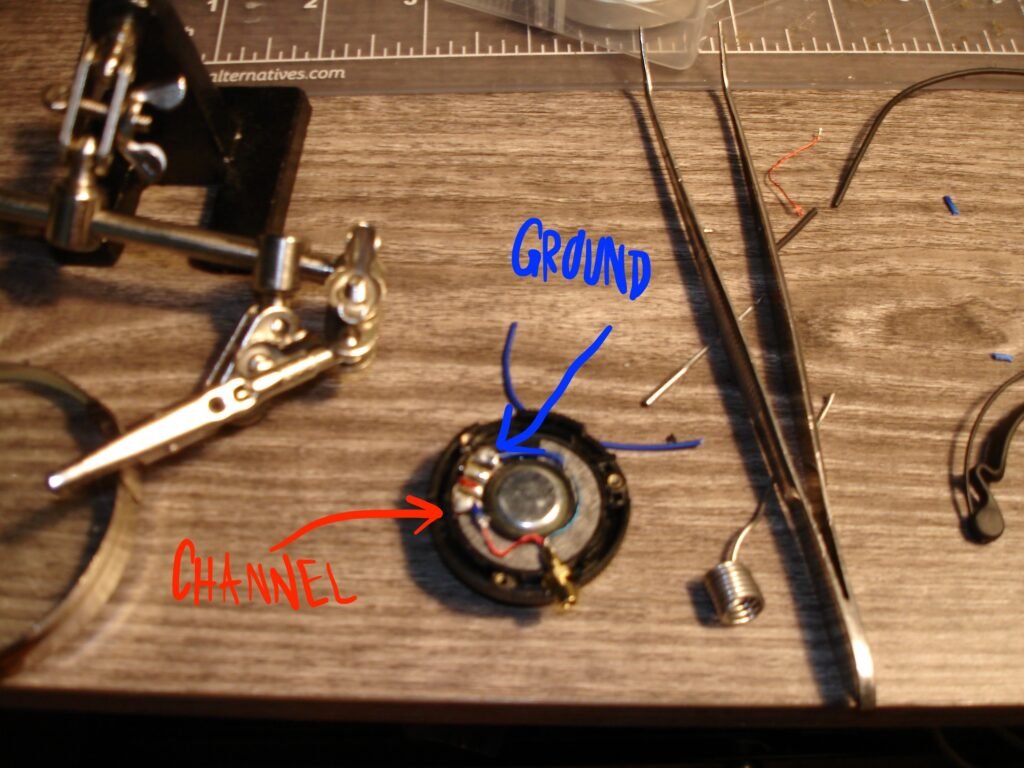
De-solder and completely remove the wires that came with the earphones. Use a length of wire to measure a clear path from the solder pad to the socket’s mounting hole. Make sure to leave some slack so the MMCX connector does not put any tension on the new wires.
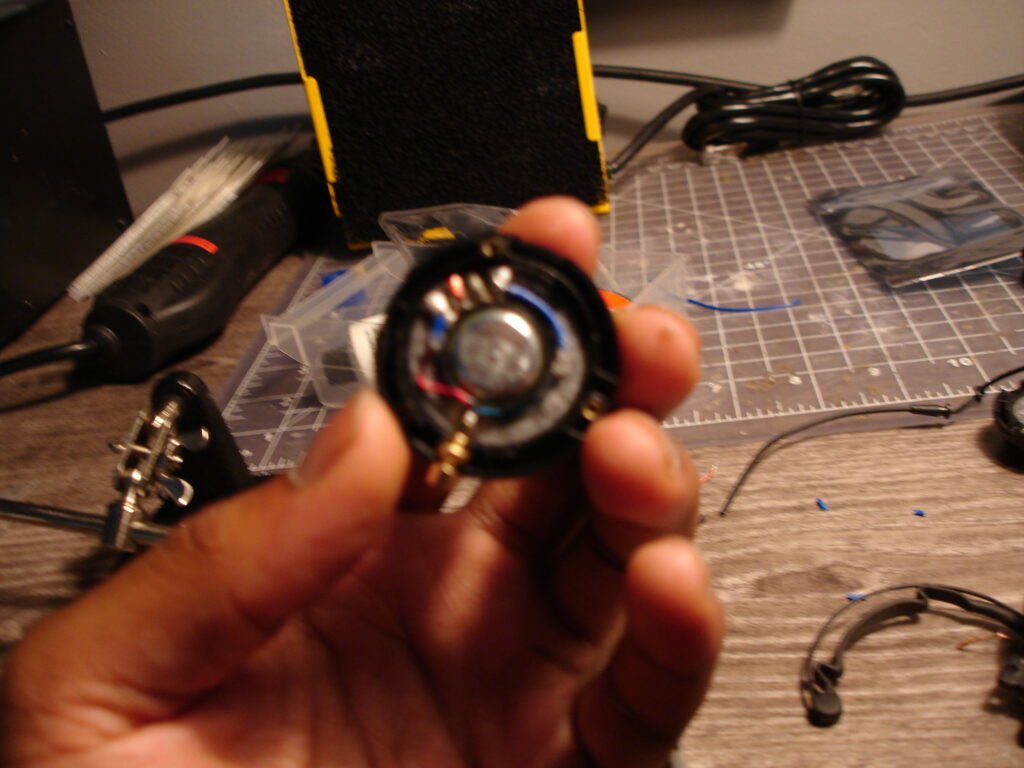
If you haven’t already, add the nut that came with your MMCX connectors to the threaded housing. Solder your wires to the exposed connections on the back of the MMCX connectors and to the speaker driver pads. Seal the solder joint around the MMCX socket to prevent any shorting. DO NOT apply any sealant around the speaker pads.
III. Make it fiiiiiittttt. This will be different for everyone depending on the specs of parts used, but it should be along the lines of the following:
- Widen the hole the original cable came out of to fit the MMCX socket.
- Fit the MMCX socket nut in between the inner and outer walls of the earphone’s main housing.
- Carve into the top cover with a craft knife or Dremel to make room for the lock nut.
This part’s pretty intuitive. Just take it slow and make sure you cut in all the right places.
IV. Allllll together now. Carefully route the cables and place the insulation foam back on top of the speaker driver. Fit the ear clip, lower housing, and outer shell back together, with screws.
Congratulations! You now have a working set of EW9 Earphones with detachable MMCX sockets.
Finalllll Noteeeee. The EW9s have slowly become my favorite headphones over the past few years. I originally bought them on a whim after coming across a clip from an old Etika stream where he professed his love for the Koss KSC75s. While I have my own beef with Koss and their QC, I still wanted to give clip-ons a shot.
The EW9s have a light sound profile that admittedly isn’t for everyone. They have a noticeably low amount of bass and deliver a pretty bright listening experience.
After installation, the MMCX sockets look like they could’ve come stock, and solve most of the problems that come with the EW9s out of the box. I’ve seen people charge hundreds of dollars for this modification, which is disappointing since it is extremely simple.
I don’t own a set of ATH EM7s but I’m pretty sure that you could follow the same steps for those as well. If anyone does, I’d love to hear about it. I made this guide especially because I hadn’t seen too many people talking about or modifying these little guys.